
Textures and materials are essential for 3D art, defining the appearance of a model, the way it interacts with lighting, and other vital issues.
Aya Khaled is a technical artist passionate about crafting textures and materials in 3D. In her creative routine, she mainly uses such tools as Adobe Substance Designer, Sampler, and Painter. Multiplatform asked Aya about her favorite tools and workflows she follows while creating Adobe 3D materials.
Crafting textures and materials: daily routine
Like many other material artists, I use different workflows in my creative routine. The first one is crafting the material from scratch with Substance Designer.
This method relies on the unique nodes in Substance Designer, with the help of which we create custom shapes and effects like cracks, moss, and grunge.
Substance Designer helps me work procedurally and expose parameters that can be changed during texturing in Substance Painter or runtime in Unity with the Substance plugin.
Now, let’s talk about the second workflow. Within this one, I use Substance Painter to add textures, scratches, rust and dust, and other effects to a 3D model. Compared to the first one, this approach is more artistic as the artist needs to try out implementing different materials, textures, alphas, and decals in Substance Painter.
The first workflow is more procedural: it allows me to craft a generic tileable material and expose parameters that can be applied to multiple game assets. The second one doesn’t involve creating material from scratch but rather a map for a particular game asset.
I see advantages and disadvantages in both workflows.
The best and wisest approach is mixing different workflows and using various tools. I love choosing this option because it allows me to demonstrate my best work without being stuck to one workflow.
Now, let’s talk about some of the Adobe 3D materials I made.
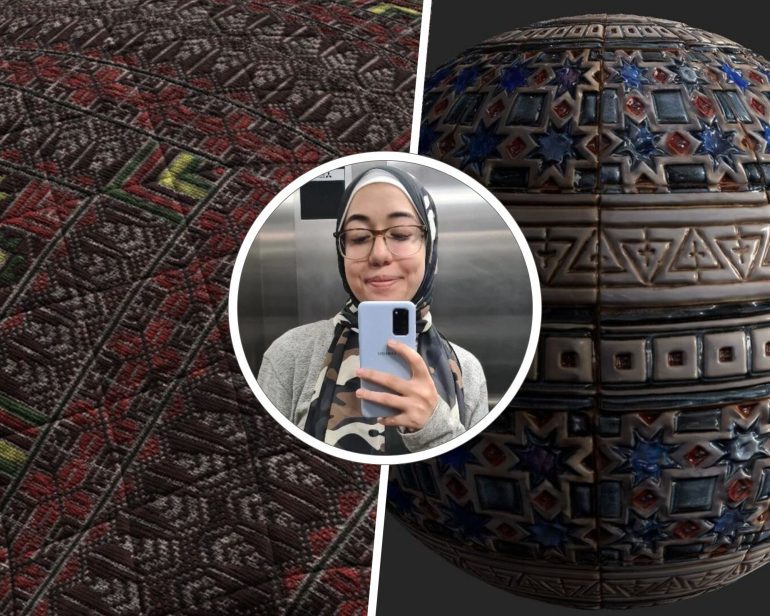
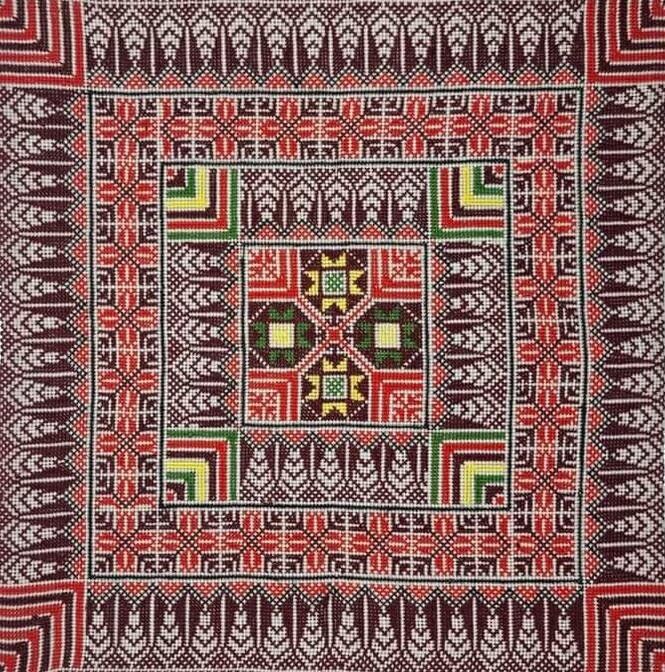
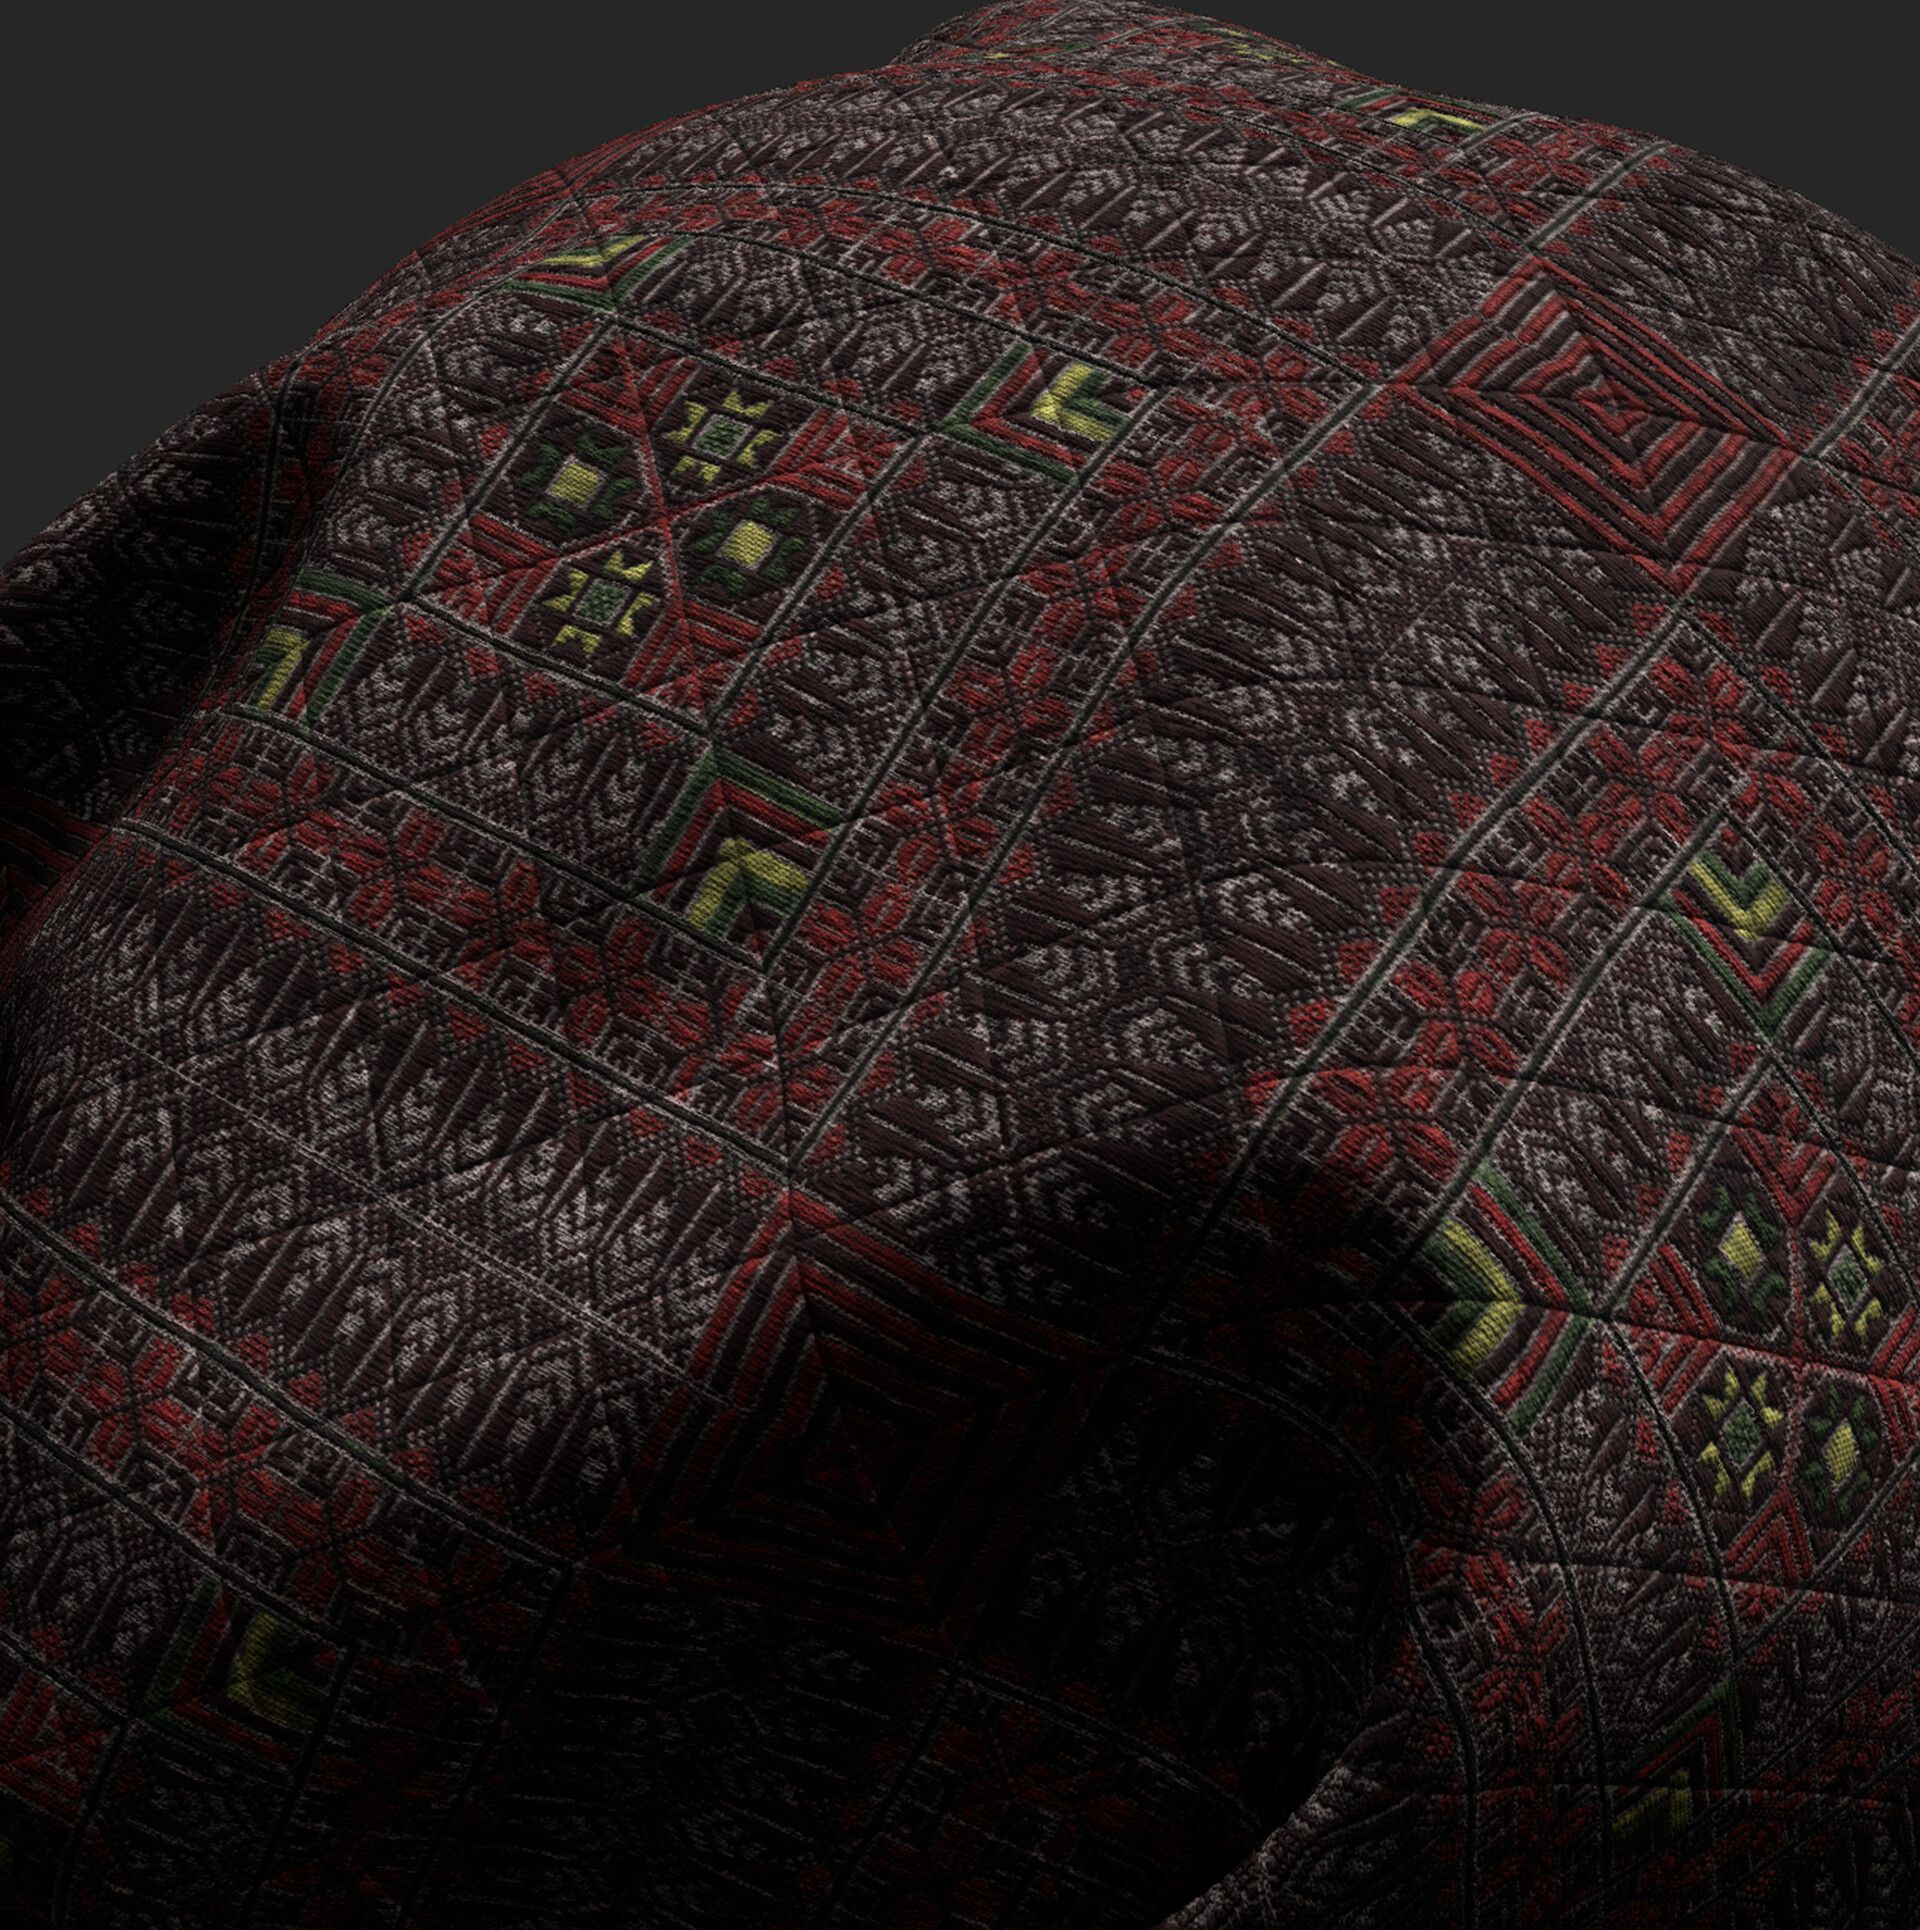
Project 1: Palestinian embroidery pattern.
Once, I came across a traditional Palestinian handmade pattern on Facebook and decided to recreate it in 3D.
What I genuinely appreciate about Adobe Substance Sampler is this tool’s ability to work efficiently. You don’t have to spend hours trying to replicate a material. Instead, you can take a picture of it and use the Image to Material AI tool in Substance Sampler. This tool offers a new way of creating artistic procedural materials. You can craft materials similar to those produced with Substance Designer without starting from scratch. It allows you to create a basic material in just a few minutes, omitting hours of dull work. From that point, you can use filters to achieve the desired look in just a small portion of the time it would have taken otherwise. In my opinion, this is a wonderful development in the world of material art.
My first step was cropping the image to fit within a square. Next, I dragged and dropped it into the Substance Sampler. When the program asked me to select what I wanted to do with the material, I chose the Image to Material AI option. With this step, I created a decent base material to which I could add details.
I adjusted the height scale and added a weave filter with ten different colors. Then, I tweaked the border and roughness of each weave and added stains and smudges to give it an old look. Then I made some finishing touches: I added quilt stitches for a diagonal stitching effect and embossed the material by using a Height to Normal filter. This was an experimental process in which I played around with various parameters and filters until I finally achieved the desired look.
It was not that long, though: the process took less than 2 hours. I then enabled shadows and increased the resolution to 4K to showcase the final product.
Project 2: Jameel House Material
I successfully combined different tools while working on this Adobe 3D materials project, using Substance 3D Sampler and Designer to create and render materials.
This project started when I discovered a highly detailed ceramic tile on the Instagram page of Jameel House of Traditional Arts in Cairo, an Egyptian art school teaching handicrafts. I asked them for permission to use the image, and they graciously consented, which I am grateful for.
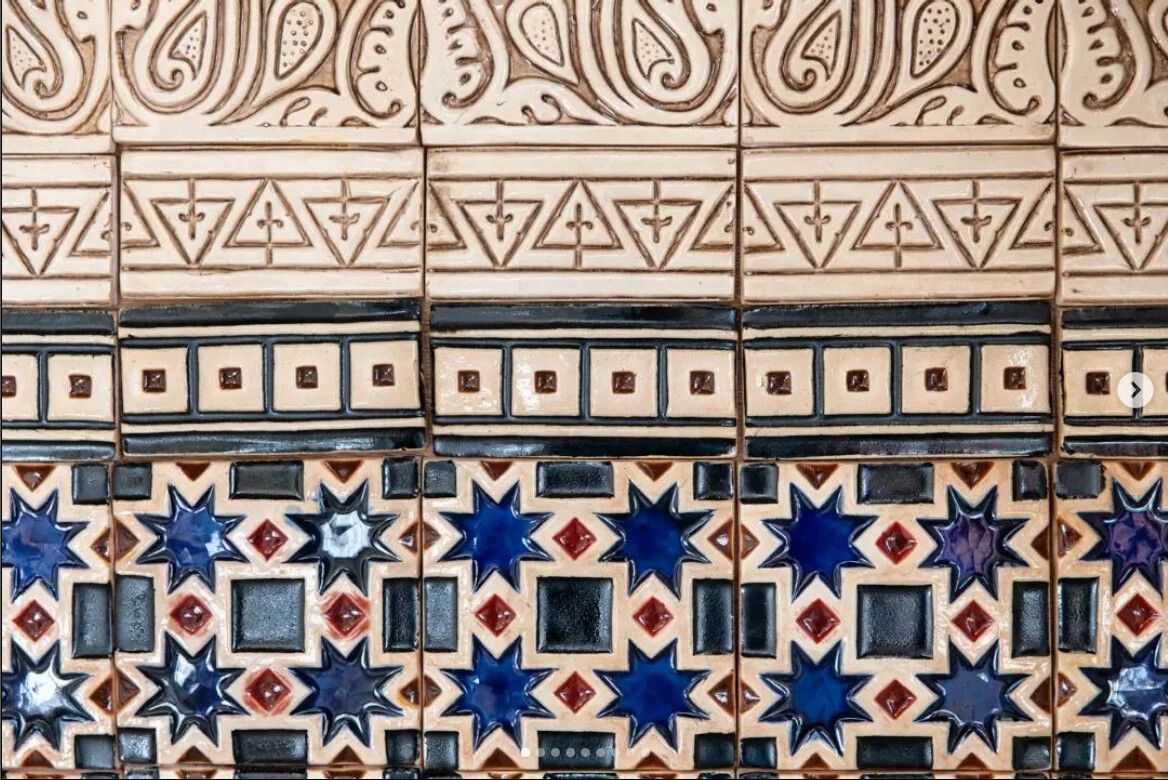
To generate the material, I imported the image into Adobe Substance Sampler with the help of the Image to Material AI tool. Cropping the image was necessary to avoid creating seams in the material.
After experimenting with different layer arrangements, I discovered that the best approach was cropping the image before generating the material.
I then used the varnish filter to create the glaze layer of ceramics and enhanced it with a surface relief filter.

Of course, ceramic materials often have natural cracks caused by high heat, but the cracks filter in Substance Sampler didn’t produce the realistic effect that I wanted to achieve.
So, I switched to Substance Designer to add the cracks effect as I wanted. After that, I exported the material and adjusted the cell thickness. The final step was importing it back into Substance Painter for rendering shots.
This is what my routine usually looks like. As you can see, creating textures and materials is an exciting process!
Author: Vira Duzhak